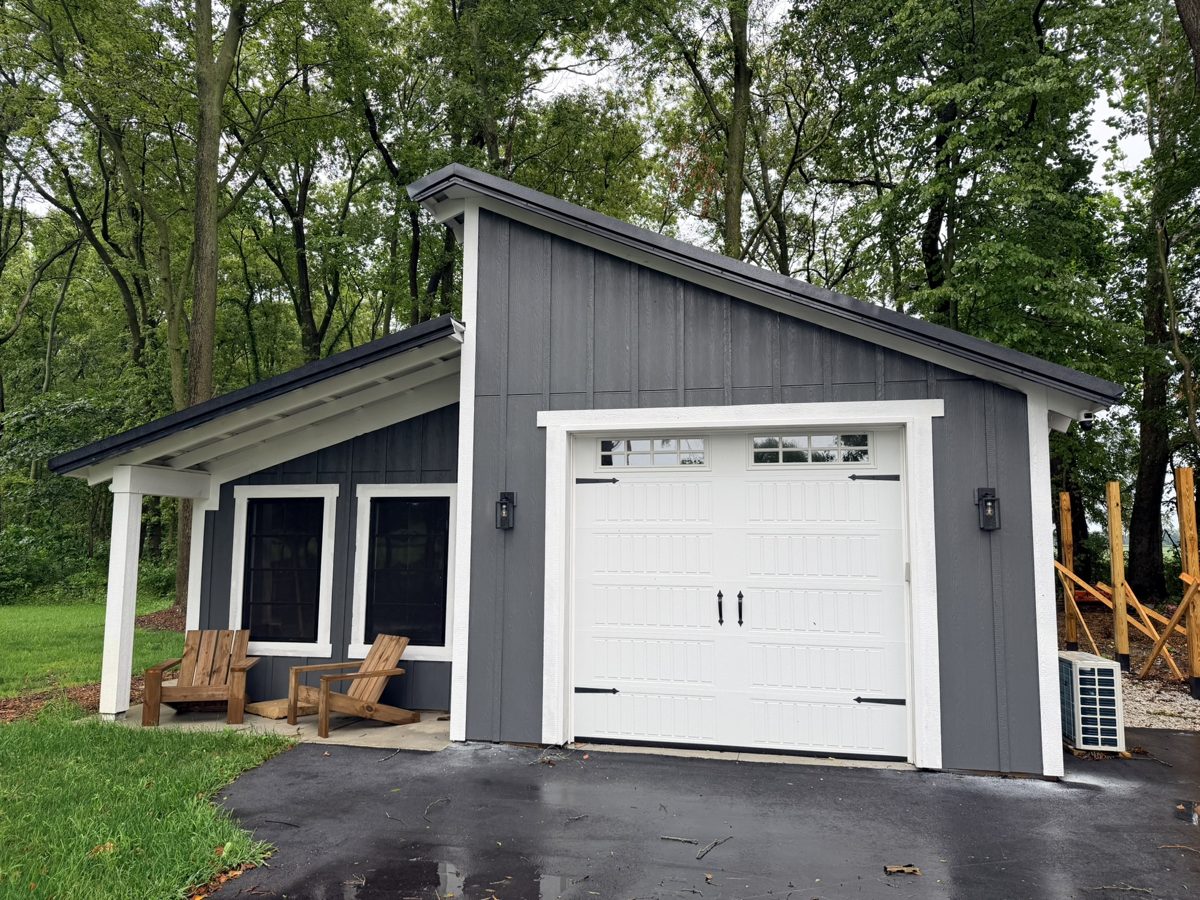
If you've ever gotten a quote from a pole barn contractor and nearly fallen off your chair, this post is for you.
A 28×32 pole barn is a serious structure — workshop space, equipment storage, a place to actually get things done on your property. Contractors were quoting me prices that put it out of reach for a lot of folks. So I built my own. And I documented every step of the process on the HomePro Hero Pole Barn Build series on YouTube so you can follow along.
In this guide, I'm going to walk you through how to build a pole barn from the ground up — the planning, the permits, the actual construction steps, and most importantly, the full cost breakdown so you know exactly where your money is going. No fluff, no contractor sales pitch. Just real numbers from a guy who's done it.
I'm not a professional builder. I'm a self-taught DIY'er with 30+ years of experience and a rule I live by: you don't have to be a pro to do pro-level work. Let me show you how.
Want to follow along visually? The video above walks through the entire build. Keep reading for the written breakdown, cost tables, and the step-by-step guide.
What Is a Pole Barn (and Why Should You Build One)?
A pole barn — also called a post-frame building — is a structure supported by large pressure-treated posts set directly into the ground or anchored into concrete, rather than a traditional poured foundation. The posts carry the roof load, which means you get massive open interior space with no load-bearing walls in the way.
That's the magic of it. No expensive foundation pour. No complicated framing. Wide-open floor plans you can configure any way you want — shop layout, equipment storage, covered parking, you name it.
Here's why pole barns are so popular right now:
- Cost-effective: Post-frame construction uses far fewer materials than traditional stick-frame buildings and goes up faster.
- Versatile: Workshop, storage, garage, barndominium, horse barn — the same basic structure works for all of them.
- DIY-friendly: If you're comfortable with basic construction tools, you can build one yourself. No specialized skills required.
- Fast to build: A professional crew can have a shell up in days. A dedicated DIY crew can do it in a few weekends.
- Durable: A properly built pole barn lasts 40–60+ years with minimal maintenance.
How to Build a Pole Barn: Step-by-Step
There are six core phases to a pole barn build. I'll walk through each one, including what to watch out for at each stage.
Plan Your Build and Choose Your Size
Before you touch a shovel, you need a plan. Decide on your intended use first — that determines your minimum square footage. A hobby workshop needs different dimensions than equipment storage or a pole barn home.
The most cost-efficient common sizes are 30×40, 40×60, and 28×32. These standard dimensions let you source materials efficiently and often reduce engineering costs. Unusual shapes or custom footprints drive prices up fast.
Also decide now: kit or custom? Pole barn kits include pre-engineered components, a materials list, and often blueprints you can take straight to your permit office. They're the easier path for most DIYers. Building from scratch gives you more freedom but requires more planning time and you may need a structural engineer's stamp for permits.
Pull Your Permit (Do This First)
This is the step people skip and then regret. In most jurisdictions, any structure over 200 square feet requires a building permit — especially if it will be used as a workshop, garage, or anything beyond basic agricultural storage. Building without one can get you fined, force a tear-down, or kill your ability to sell the property.
Contact your local building department before you buy a single board. Tell them the size, intended use, and location on your property. They'll tell you what you need. You'll typically submit a site plan (showing where the barn sits on your lot), structural drawings, and pay a permit fee.
The permit also triggers required inspections — usually at post-setting and framing stages. That's actually a good thing. It means someone with authority checks your work before you cover it up.
Prepare the Site
A level, properly drained site is the foundation of a pole barn that lasts. Start by clearing the footprint — remove rocks, roots, and debris. You need the area graded level (or within a few inches) so water drains away from the structure, not under it. Pooling water around posts is the fastest way to rot them out prematurely.
Mark your post locations using batter boards and string. Use the 3-4-5 rule (or check diagonals) to make sure your corners are square before you dig a single hole. Mistakes here multiply through every step that follows.
If you're adding a concrete floor later, plan your drainage and any underground conduit runs now — it's infinitely cheaper than trying to do it after the building is up.
Set the Posts
This is the most critical step of the entire build. Your posts need to go in plumb, level, square, and at the right depth. Get this wrong and nothing else lines up.
Post depth depends on your local frost line — in most Midwest and northern states, that means 4–5 feet deep, sometimes more. Your permit office will tell you the minimum depth required for your area.
Use pressure-treated posts rated for ground contact (look for UC4B or UC4C rating for direct burial). Dig your holes, drop in a temporary board to suspend the post off the bottom of the hole, pour concrete around the base, then backfill. The concrete collar at the base — not the post itself — is what anchors everything.
Brace every post plumb immediately after setting. Don't move on until your inspector signs off on the foundation if your permit requires it.
Frame the Roof: Install Trusses and Girts
With posts set and braced, you'll notch the tops of your posts (or use truss carriers depending on your design) to seat the roof trusses. Trusses are the triangular roof framework — they carry all the roof load down to your posts. Do not cut corners here. Use the exact truss specifications your plans call for.
Girts are the horizontal wall framing members that run between your posts. They support the siding and add lateral stability to the structure. Bookshelf girts (installed on edge rather than flat) are stronger and are the preferred method for most modern pole barn builds.
Once trusses are secured to the columns and braced, you'll install purlins across the top of the trusses — these are the horizontal members your metal roofing will screw into.
Install Roofing and Siding
Metal roofing is the standard choice for pole barns — and for good reason. It's durable, low-maintenance, handles snow load well, and is faster to install than shingles. Use the correct screws for roof versus wall panels — they're different, and using the wrong ones causes leaks.
Work your trim carefully. Read the trim installation guide that comes with your materials before you start. Trim errors are common — installers put trim in the wrong locations or end up short. Lay it all out first, label it, and install from the bottom up.
Metal siding goes on after roofing. Overlap correctly for weather tightness, and seal around any penetrations (overhead door headers, walk-door frames, windows) with quality flashing tape.
Doors, Windows, and Finishing
Overhead doors and walk doors need to be framed before siding — frame them into your initial post layout, not as an afterthought. Large overhead door openings require proper header sizing; consult your plans or an engineer for any span over 12 feet.
If you're wiring for electricity, this is when your electrician runs rough-in wiring before you insulate or drywall. Same for any plumbing — rough in now or live with regrets later.
Insulation is your last big decision. Closed-cell spray foam gives you the best vapor barrier and R-value in a pole barn. Rigid foam board is more budget-friendly. Fiberglass batts work but require a separate vapor barrier in most climates. Don't skip this if you plan to use the space year-round.
Pole Barn Cost Breakdown: Real 2025 Numbers
This is the section most guides skip or bury. I'm putting it front and center because it's the number one thing you need before you commit to a build. These figures are based on a 28×32 DIY build using a kit or pre-purchased materials — not a contractor build, which will typically run 1.5–2× these numbers.
| Cost Item | Low Estimate | High Estimate | Notes |
|---|---|---|---|
| Site prep / grading | $500 | $3,500 | DIY grading saves significantly; heavy equipment rental or contractor needed for rough terrain |
| Permits & fees | $200 | $1,200 | Varies widely by county; rural areas often cheaper |
| Posts (pressure-treated 6×6) | $800 | $1,500 | Qty varies by post spacing; 8 ft on center is common |
| Concrete (footings) | $400 | $900 | Bagged mix for post footings; slab is a separate line item |
| Trusses | $1,800 | $3,500 | Engineered trusses recommended; pricing per-truss varies by span |
| Framing lumber (girts, purlins, headers) | $1,500 | $3,000 | Lumber prices fluctuate — buy when markets are down |
| Metal roofing panels | $1,400 | $2,800 | 29-gauge standard; 26-gauge is stronger and worth the upcharge |
| Metal siding panels | $1,200 | $2,400 | Matches roofing; includes trim pieces |
| Overhead door(s) | $900 | $2,500 | Single 10×10 door; insulated doors cost more but worth it for shops |
| Walk door + windows | $400 | $1,200 | Standard 36-in walk door; windows optional but add light and ventilation |
| Hardware & fasteners | $300 | $700 | Don't cheap out here — use manufacturer-specified screws |
| Concrete floor slab (optional) | $3,500 | $7,200 | $4–$8/sq ft installed; skip if using gravel or dirt floor |
| Electrical rough-in (optional) | $1,500 | $4,000 | Add 200-amp sub-panel for a proper shop; hire licensed electrician |
| Insulation (optional) | $1,200 | $4,500 | Spray foam is premium; fiberglass batts are budget-friendly |
| Tool rental | $200 | $600 | Auger rental for post holes is a must-have; scaffolding for roofing |
| Total — Shell Only (no slab, no electric, no insulation) | ~$9,000 | ~$18,000 | |
| Total — Fully Finished Shop (all options) | ~$16,000 | ~$33,000 | |
| * Estimates based on 28×32 (896 sq ft) DIY build using kit or purchased materials. Labor not included. Prices reflect mid-2025 material markets. Regional variation applies. Contractor builds typically run 1.5–2× these figures. | |||
Get the Full Pole Barn Build Plans
Instant-download PDF plans with step-by-step instructions, materials list, cut sheets, and full dimensions. Everything you need to start building — no guesswork.
Get the Full Plan Set — $24.99 →DIY vs. Contractor: Which Is Right for You?
This is a legitimate question and the answer depends on your time, skill level, and budget. Here's an honest comparison:
| Factor | DIY Build | Contractor Build |
|---|---|---|
| Typical cost per sq ft | $10–$25 | $20–$60+ |
| Time commitment | 6–10 weekends | 3–7 days (crew) |
| Skill required | Basic construction experience | None — they handle it |
| Permit responsibility | You pull it | Contractor often handles |
| Quality control | You control every detail | Varies by contractor |
| Satisfaction | You built it yourself | It's just done |
| Risk | Mistakes are on you | Contractor is liable |
| Best for | Handy DIYers with time and patience | Those who want it done fast with no hassle |
My take? If you have basic construction skills and can commit the weekends, DIY is almost always worth it. The savings are real — often $15,000–$30,000 on a mid-size build — and the experience of building something that will stand on your property for decades is hard to put a dollar value on.
That said, there's no shame in hiring out the shell and finishing the interior yourself. A hybrid approach — contractor for posts, trusses, and roofing; you for siding, doors, and interior — can split the cost difference nicely.
Pole Barn Permits: What You Need to Know Before You Build
Permits are the part of this project nobody wants to deal with. But they protect your investment. Here's the short version of what you need to know:
- Most structures over 200 sq ft require a permit — especially anything used as a workshop, garage, or commercial space.
- Agricultural structures on rural land sometimes get a pass, but never assume — always verify with your county.
- You'll need a site plan showing where the barn sits on your property, setback distances from property lines, and the size of the structure.
- Engineered drawings are typically required for larger structures or any intended for occupancy. Your kit supplier usually provides these — it's one of the best reasons to buy a kit over building fully from scratch.
- Inspections happen at post-setting and framing stages. Schedule them proactively to avoid delays.
- Electrical and plumbing require separate permits and licensed contractors in most states.
Ready to Start Your Build? Get the Plans First.
The HomePro Hero pole barn plans give you the structural layout, post spacing, dimensions, and materials list. Instant PDF download, built for DIYers.
Get the Plans →