
Three years ago I built a DIY mobile workbench in my garage for just under $200, filmed the whole thing, and put it on YouTube. I figured a few hundred people might watch it. Over a million did. More than 5,000 of them downloaded the plans and built their own.
But here's the part nobody tells you when a project blows up: the real test isn't the build day. It's the next three years. This bench has been on the business end of almost every project I've shot since — my pole barn, retaining walls, shiplap, wainscoting, benches, beams, shutters, flower pots, and a pile of stuff in between. So I know exactly what holds up and what I'd do differently if I built it again tomorrow.
This is that honest breakdown. I'll walk you through what I built, what it cost, and the mistakes I made so you don't have to make them too.
Why I Built a Mobile Workbench Instead of Buying One
I was tired of working off the garage floor. Bending over, kneeling on concrete, chasing parts around — it's miserable and it's hard on your back. I wanted one bench that could do three things: hold my miter saw, hold my table saw, and still give me a big flat surface when I needed to lay out a project.
Nothing off the shelf checked all three boxes without costing a fortune. So I built it. And honestly, that's the whole HomePro Hero philosophy in a nutshell — no one's going to build something for your shop better than you can build it yourself. You know your space, your tools, and your budget better than any factory does.
The other reason: mobility. I had cars parked in my garage bays back then. With this thing on caster wheels, I'd pull a car out, roll the bench into the middle of the floor, knock out my project, and tuck it back against the wall when I was done. That flexibility alone made it worth building.
What It Cost to Build (Then vs. Now)
When I built this three years ago, the whole thing came in just under $200. The bulk of that money went to the sheet goods — the OSB and the MDF top — plus the four caster wheels. The 2x4s were cheap, which is the beauty of building with construction lumber. I actually bought 15 of them because the store had a rough selection and I wanted enough decent boards to pick through.
I'll be straight with you: lumber and sheet goods have climbed since then. If you build this today, budget a bit more than $200 — probably noticeably more depending on where you live and what plywood's running. The design hasn't gotten more expensive; the materials have. It's still one of the cheapest ways to get a serious workbench with two integrated saws.
The Materials and Tools I Used
The frame is built from 2x4s and 2x6s. The 2x6s give the base some girth and stiffness; everything above that is 2x4. For the surfaces I used half-inch OSB on the lower shelf and three-quarter-inch on top, with an MDF top for the work surface (more on that mistake later). Four locking caster wheels, two-and-a-half-inch construction screws, and a good bead of Liquid Nails in the corners to kill any wobble.
I'm a DeWalt guy across the board, and I built this whole thing with the same battery platform I've run for years. Every tool I used on this build is over on my tools page if you want to see exactly what's in my shop.
A Note on Lumber Selection
Buy extra 2x4s. They're cheap, and store stock is hit or miss — you'll find twisted, cupped, and cracked boards mixed in with the good ones. I'd rather grab a couple extra and pick through them at home than make a second trip. Any slivers and offcuts get used for blocking and supports anyway, so nothing really goes to waste.
Grab two or three more 2x4s than your cut list calls for. At the price of construction lumber, a few spare boards are cheaper than a second trip to the store when you find half your pile is junk.
How I Built It, Step by Step
I'm going to keep the build overview light here, because the full cut list, dimensions, and SketchUp drawings are all in the plans. But here's how it goes together.
Building the Frame and Base
I framed the base first — two 2x6s cut to 5'6" with uprights on each end and one in the middle. Liquid Nails in the corners, screws through both directions, and a speed square to keep everything straight as I went. I didn't obsess over squaring everything perfectly in the early stages; you square it all up as the structure comes together.
Adding the Caster Wheels
Four locking casters so I can roll it anywhere and then lock it down solid when I'm working. This is what makes it a true rolling workbench instead of a fixed station bolted to one wall.
The Table Saw Station
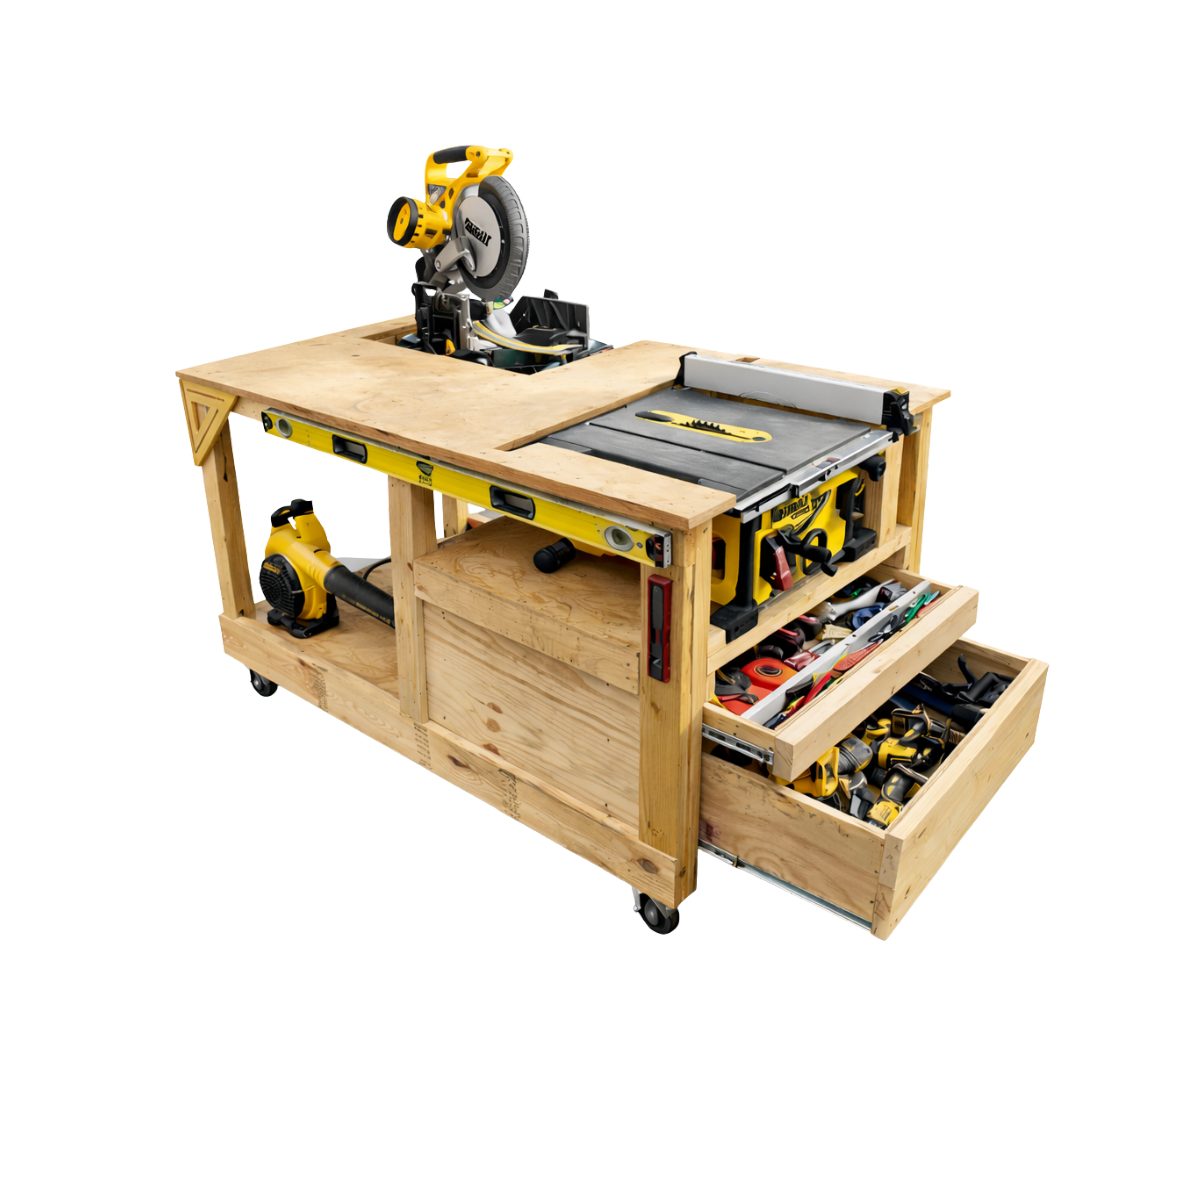
The table saw drops into a shelf on one end. Every saw is a slightly different size, so this is one spot where you'll need to measure your own saw and customize — don't just copy my numbers. I sized the opening so the blade guard had room to move and the fence cleared the edge.
The Drop-Down Miter Saw Station
This is my favorite feature and the one people ask about most. The miter saw mounts on a drop-down hinged section. When I need it, the saw sits at the right height to use. When I don't, I drop the front down, drop in a filler piece, and that spot becomes flat worktop. It's the trick that makes the whole bench so versatile. I later added a dedicated drawers build and even a battery-powered version of the bench — both are on the channel if you want to go deeper.
The Convertible 6x4 Worktop
Drop the miter saw down, plug in the MDF filler, pull the fence guard off the table saw, and you've got roughly a 6-foot by 4-foot flat surface at waist height. That's the payoff. Two saws integrated, and when you need a big assembly table, it's right there.
Here's the original build, start to finish, if you want to watch it come together:
3 Years Later — What I'd Do Differently
Here's where three years of real use earns its keep. These are the changes I'd make if I built it again.
Skip the MDF Top — Use Plywood
This is my number one regret, and the comment section called it out on day one. MDF seemed perfect at the time: cheap, dead smooth, cuts clean. But a workbench top doesn't need to be smooth — you're cutting, drilling, and sanding on it. What it needs to be is durable, and MDF isn't. It soaks up moisture, swells at the ends, and the edges chip. Worst part: once MDF starts to fail, it just keeps failing. You can't fix it, you replace it.
If I built this again I'd use three-quarter-inch plywood, or maybe a slick laminate top. Plywood takes a beating, sands down, and keeps going. Family Handyman makes the same case in their workbench plans — plywood gives you a flat, stable surface you can simply replace when it's beat up, instead of one that fails on you for good.
Bigger Casters, Better Hardware
I went with small, cheap plastic casters to stay under that $200 budget. Mistake. They're too small, and one day pushing the bench over the lip of my garage door, a caster ripped clean off — because I'd used screws that were too small to hold it. If I did it again: bigger casters, rubber over plastic, beefier mounting hardware, and some extra blocking behind them for support.
Don't cheap out on casters or the screws that hold them. Undersized hardware is exactly how I tore a wheel off rolling over my garage lip. Size the casters and the fasteners for the full weight of a loaded bench.
Drop the Built-In Drawers
I thought built-in drawers were an upgrade. They're not — they're dead space that's locked to the bench. The drawers only travel as far as the bench travels. These days I'd rather run a mobile tool packout that I can grab and carry anywhere, in the shop or out. A lot of viewers who built the bench skipped the drawers entirely and came up with smarter open-storage setups underneath.
Dust Collection — Worth It, With One Catch
I added dust collection to this bench later — a separator on a 5-gallon bucket with lines running to both saws. When it works, it's fantastic. The catch: I don't have enough suction to pull from both saws at once, so I use blast gates to switch between them, and the miter saw hose likes to get in the way on 45-degree cuts. Dust collection sounds great on paper, but you'll fine-tune the hose routing once you actually live with it.
What I Wouldn't Change
Plenty held up. The height is dialed in — I'm 6'1" and set it to waist height, and nothing beats not bending over all day. (It's easy to lower if you're shorter.) The mobility has paid off on project after project. And having both saws integrated into one bench is honestly priceless. Drop the chop saw, plug the top, and your "two saws" become a giant flat table. That core design? I'd build it exactly the same way again.
I put everything — the full cut list, every dimension, and the SketchUp drawings — into my premium mobile workbench plans. Over 5,000 people have already built this bench. Skip the guesswork and the mistakes I made, and build it right the first time.
Get the Mobile Workbench Plans →Frequently Asked Questions
How much does it cost to build a mobile workbench?
I built mine for just under $200 three years ago. Material prices have climbed since, so budget somewhat more today — but it's still far cheaper than a comparable bench with two integrated saws, and the 2x4 framing keeps the core cost low.
What size should a mobile workbench be?
Mine gives a roughly 6-foot by 4-foot work surface at waist height. I'm 6'1", so I set it tall on purpose — bending over a low bench all day is rough on your back. Size and height are easy to adjust to your space and your build.
What's the best material for a workbench top?
After three years, I'd skip MDF and go with three-quarter-inch plywood or a slick laminate. MDF swells with moisture and chips at the edges, and once it fails you have to replace it. Plywood takes abuse and sands back to life.
Can you put a table saw and miter saw on the same workbench?
Yes — that's the whole point of this build. The miter saw sits on a drop-down hinged section, and the table saw drops into a shelf on the end. When you're not using the miter saw, you drop it down, fill the gap, and the entire top becomes one flat work surface.
Ultimate Workshop Table Plans
The same mobile workbench from "Build This Workbench for UNDER $200," watched over a million times.